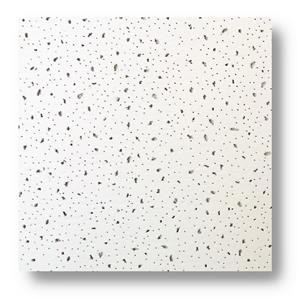
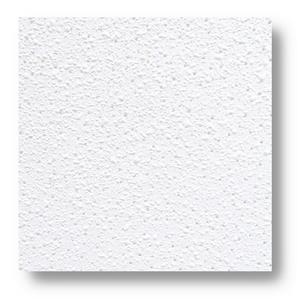
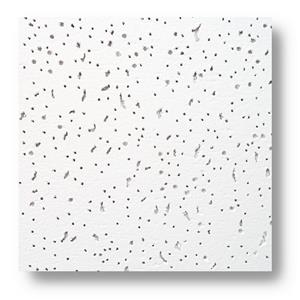
Step-by-Step Guide to Installing Mineral Fiber Ceiling Tiles
Mineral Fiber Ceiling Tiles have become one of the most popular choices for commercial and residential ceilings due to their affordability, sound-absorbing properties, thermal insulation, and aesthetic appeal. Whether you're remodeling an office space or upgrading a basement, installing it can dramatically enhance the look and performance of your interior space.
In this step-by-step guide, we’ll walk you through the entire process of installing it, from preparation to final finishing. By the end, you’ll be equipped with the know-how to handle the project efficiently and professionally.
Why Choose Mineral Fiber Ceiling Tiles?
Before jumping into the installation, it's important to understand why Mineral Fiber Ceiling Tiles are a top choice:
Acoustic insulation: Great for reducing noise between floors.
Moisture resistance: Many tiles are designed to perform well in humid environments.
Fire resistance: Enhanced safety for residential and commercial buildings.
Easy maintenance: Simple to clean or replace individual tiles.
Aesthetic versatility: Available in various textures, patterns, and colors.
Tools and Materials Needed
To install Mineral Fiber Ceiling Tiles, you will need:
Ceiling tile grid system (main tees, cross tees, wall angles)
Mineral Fiber Ceiling Tiles
Measuring tape
Level
Chalk line
Tin snips or wire cutters
Power drill
Screws and anchors
Ladder or scaffold
Safety glasses and gloves
Step 1: Plan Your Ceiling Layout
Begin by measuring the dimensions of the room. Calculate how many Mineral Fiber Ceiling Tiles you’ll need based on the standard tile size (typically 2'x2' or 2'x4'). Create a layout to determine the best placement for full and partial tiles. It's best to position full tiles at the center and partial ones at the perimeter for a balanced look.
Step 2: Install Wall Angles
Mark the desired ceiling height on all four walls using a level. Use a chalk line to snap level lines. Next, attach the wall angles along these lines using screws or anchors, depending on whether you're drilling into drywall, concrete, or brick. Wall angles serve as the perimeter support for the grid.
Step 3: Suspend the Main Tees
Main tees form the backbone of your grid. Using your layout plan, measure and mark where each main tee will be installed. Secure ceiling wires to the ceiling joists, spaced no more than 4 feet apart. Hang the main tees from these wires, ensuring they are level and properly aligned. Adjust the wire length as necessary.
Step 4: Add Cross Tees to Form the Grid
Once the main tees are installed, begin inserting the cross tees to create a grid pattern that matches the size of your Mineral Fiber Ceiling Tiles. Use the integrated notches and slots in the grid system for easy snapping into place. Check for squareness and make any necessary adjustments.
Step 5: Cut Tiles to Fit
Use a utility knife to cut Mineral Fiber Ceiling Tiles to fit around edges, corners, light fixtures, or air vents. Be sure to measure twice before cutting to ensure a tight, clean fit. Always wear safety gear when cutting tiles, as the mineral fiber material can produce dust particles.
Step 6: Install the Ceiling Tiles
With your grid in place, gently lift and angle each Mineral Fiber Ceiling Tile above the grid opening, then lower it into place. Start with full tiles at the center and move outward toward the walls. Be careful not to bend or damage the edges.
Step 7: Finishing Touches
Inspect the installation to ensure all Mineral Fiber Ceiling Tiles are level and properly seated in the grid. Make final adjustments where needed. Install any lighting fixtures, HVAC vents, or ceiling fans last to avoid disrupting your tile layout.
Maintenance Tips
Dust regularly with a microfiber cloth or vacuum cleaner.
Replace damaged tiles immediately to maintain aesthetics and performance.
Avoid excess moisture, unless using water-resistant models.
Final Thoughts
Installing Mineral Fiber Ceiling Tiles is a manageable project that can significantly improve the look, acoustics, and thermal performance of your space. With the right tools, a solid plan, and some patience, even a DIY enthusiast can achieve professional-looking results. Whether in an office, basement, or commercial setting, Mineral Fiber Ceiling Tiles offer a reliable and stylish solution for any ceiling renovation.
If you’re considering a ceiling upgrade, don’t overlook the benefits and beauty of Mineral Fiber Ceiling Tiles. They’re an investment in comfort, style, and value.


